Using the Instagram Basic Display API with Rails

Earlier this year at Kit, we released a great feature that allows you to use your Instagram images in landing pages, forms, sequences, and campaigns. It’s such a fun feature! While building it, I often found myself distracted by making beautiful landing pages using my own pictures.
Interfacing with Instagram has been a little rough for developers over the last few years. With their original API in slow decline and few options on the horizon, many developers were left wondering what on earth to do—we certainly were.
We were glad when Facebook released the Instagram Basic Display API, a basic API to pull in images and profile information. It looked like it might just do the trick! It’s not limited to Instagram Professional accounts (unlike the Instagram Graph API), and it seemed to have all the functionality we needed.
The Instagram Basic Display API allows users of your app to get basic profile information, photos, and videos in their Instagram accounts.
So far, so good. But the API was brand new, not thoroughly documented, and few other developers had experience integrating with it. I didn’t see an existing Ruby client gem, and I wasn’t sure how easy the auth flow would be. In the spirit of teaching everything we know, here’s how we integrated with the Instagram Basic Display API, and how you can too.
Not too interested in the details? Here’s the client gem we created, which you’re welcome to use in your own projects. We’d love your feedback and contributions!
0. Getting set up for development
To get set up for development, I read through the getting started guide that Facebook has provided for the Instagram Basic Display API. It takes you through the confusing dashboard and shows you how to set up an app, retrieve your client_id and client_secret, and set your redirect_uri. If you already have a Facebook app, you can skip half the walkthrough. At the end of it, you should have the variables you need to start developing.
1. Implementing the authorization window
Gaining access to the Basic Display API begins with the Authorization Window. It’s the little window that pops up and asks whether you give permission for Kit to read your data. Once the authorization is complete, you’ll be given an authorization code, which is valid for one hour. This authorization code can’t make requests to the Basic Display API itself, but it can be exchanged for a token that can be used to make requests.
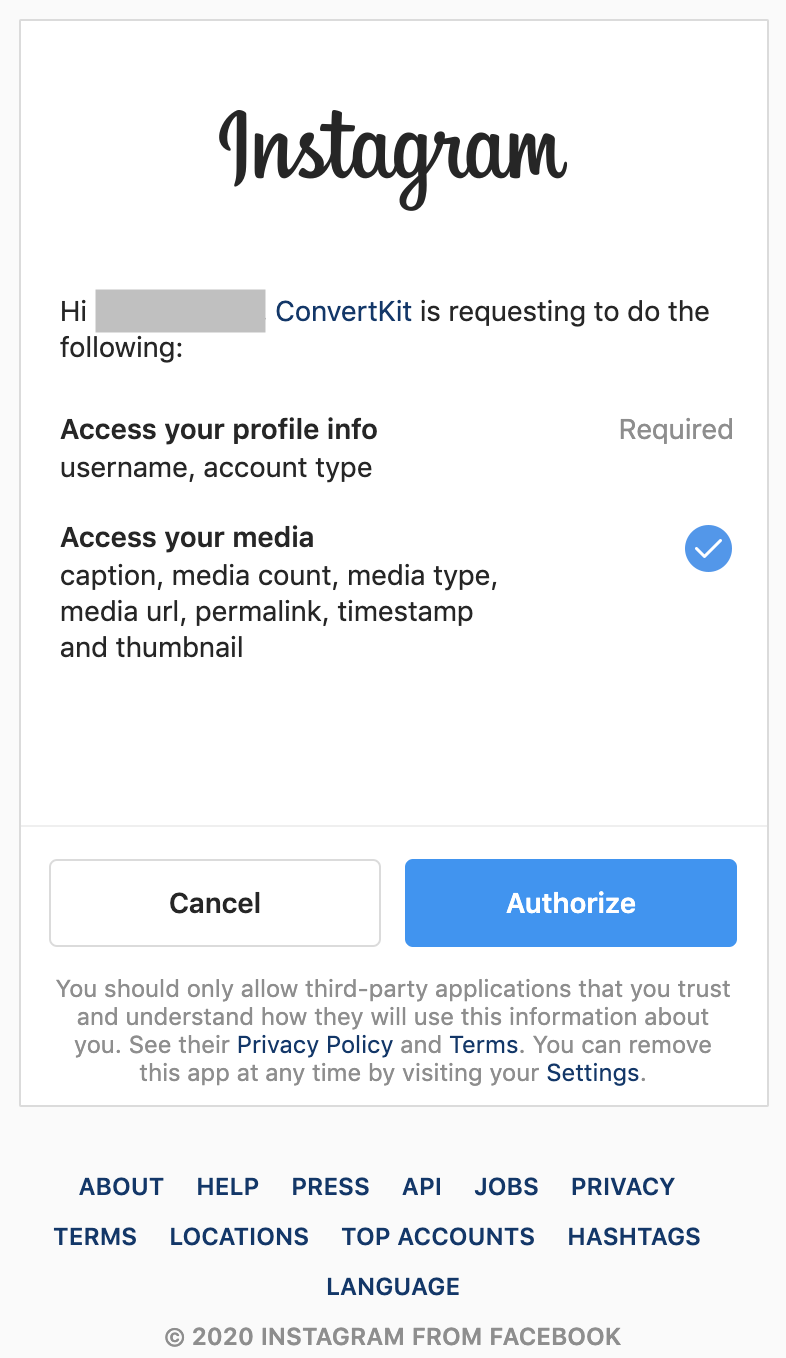
To implement the authorization window, you make a GET request to a url that includes your client_id, redirect_uri, and the permission scopes you’re asking for.

The redirect_uri is important. After the authorization is granted, you’ll be sent to that redirect_uri, with the code provided as a query parameter. So, if your redirect_uri is https://my-app.com/instagram/auth, then you’ll be redirected to https://my-app.com/instagram/auth?code=code_goes_here.
To get a feel for it, I constructed the url with my variables filled in, then pasted it into my browser. Once I understood how the redirection worked, I moved on to capturing the code to use it for making further requests. Here’s what a Rails controller action to do that might look like:
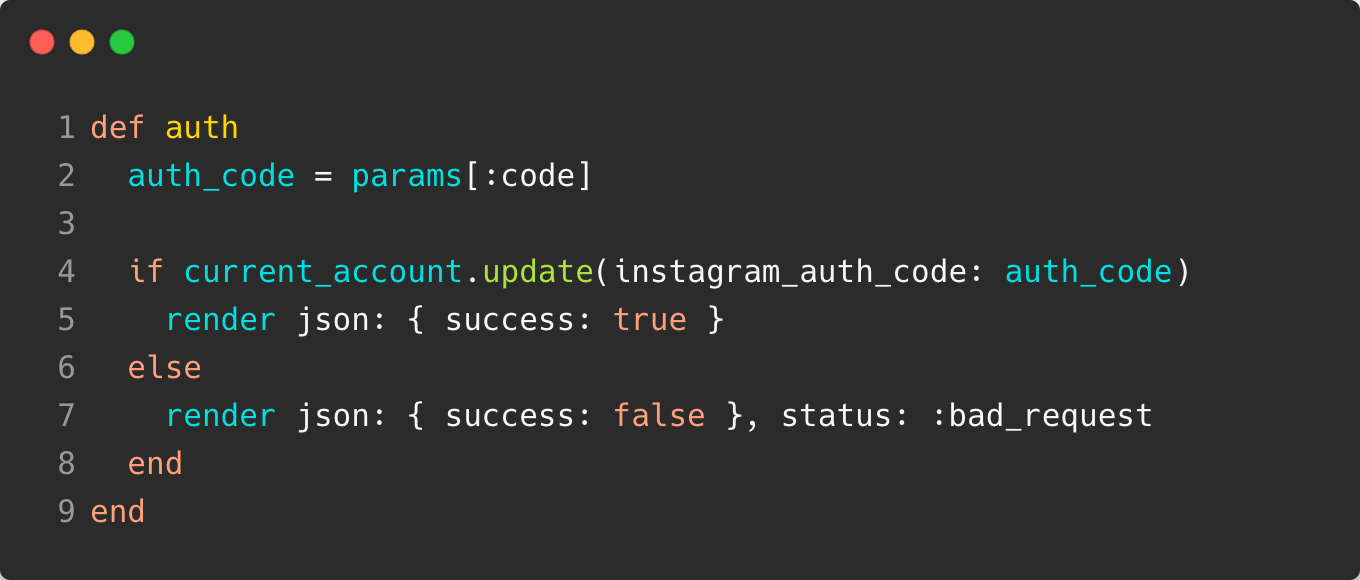
This authorization code can’t be used to make a request to the Basic Display API, though. It needs to be exchanged for an auth token.
2. Requesting a long-lived auth token
It’s important to understand the different auth tokens that Instagram offers.
- Authorization Code: This is the code that we get after implementing the authorization window. It is valid for one hour. It can’t be used to make requests to the Basic Display API. We can exchange it for a…
- Short-lived Token: An access token that can be used to make requests to the Basic Display API. It is valid for one hour. We can exchange it for a…
- Long-lived Token: An access token that can be used to make requests to the Basic Display API. It is valid for 60 days.
It’s also worth noting that long-lived tokens can be refreshed! This means that you can refresh these tokens when they’re near to expiring, so your users don’t have to reauthorize every 60 days. That’s what we were aiming for in our implementation.
So, to make that happen, I needed to:
- Get an authorization code with the authorization window
- Exchange that for a short-lived token
- Exchange the short-lived token for a long-lived token
- Create a way to refresh the long-lived token every 60 days
I went through the flow of getting a long-lived token a couple of times using Postman (I set up some automations to make it a little less fiddly), just to get a feel for it. Remember that until your app has been approved by Facebook and put into live mode, you are rate-limited. You might hit those rate limits if you have several people working on and testing your feature at the same time.
I decided to write a client gem for the Basic Display API, so that we could hide the details of all these requests and present a consistent interface wherever we decided to use the API in our application.
I made a convenience method that would take an authorization code, exchange that for a short-lived token, then exchange that for a long-lived token, which we could persist to storage.
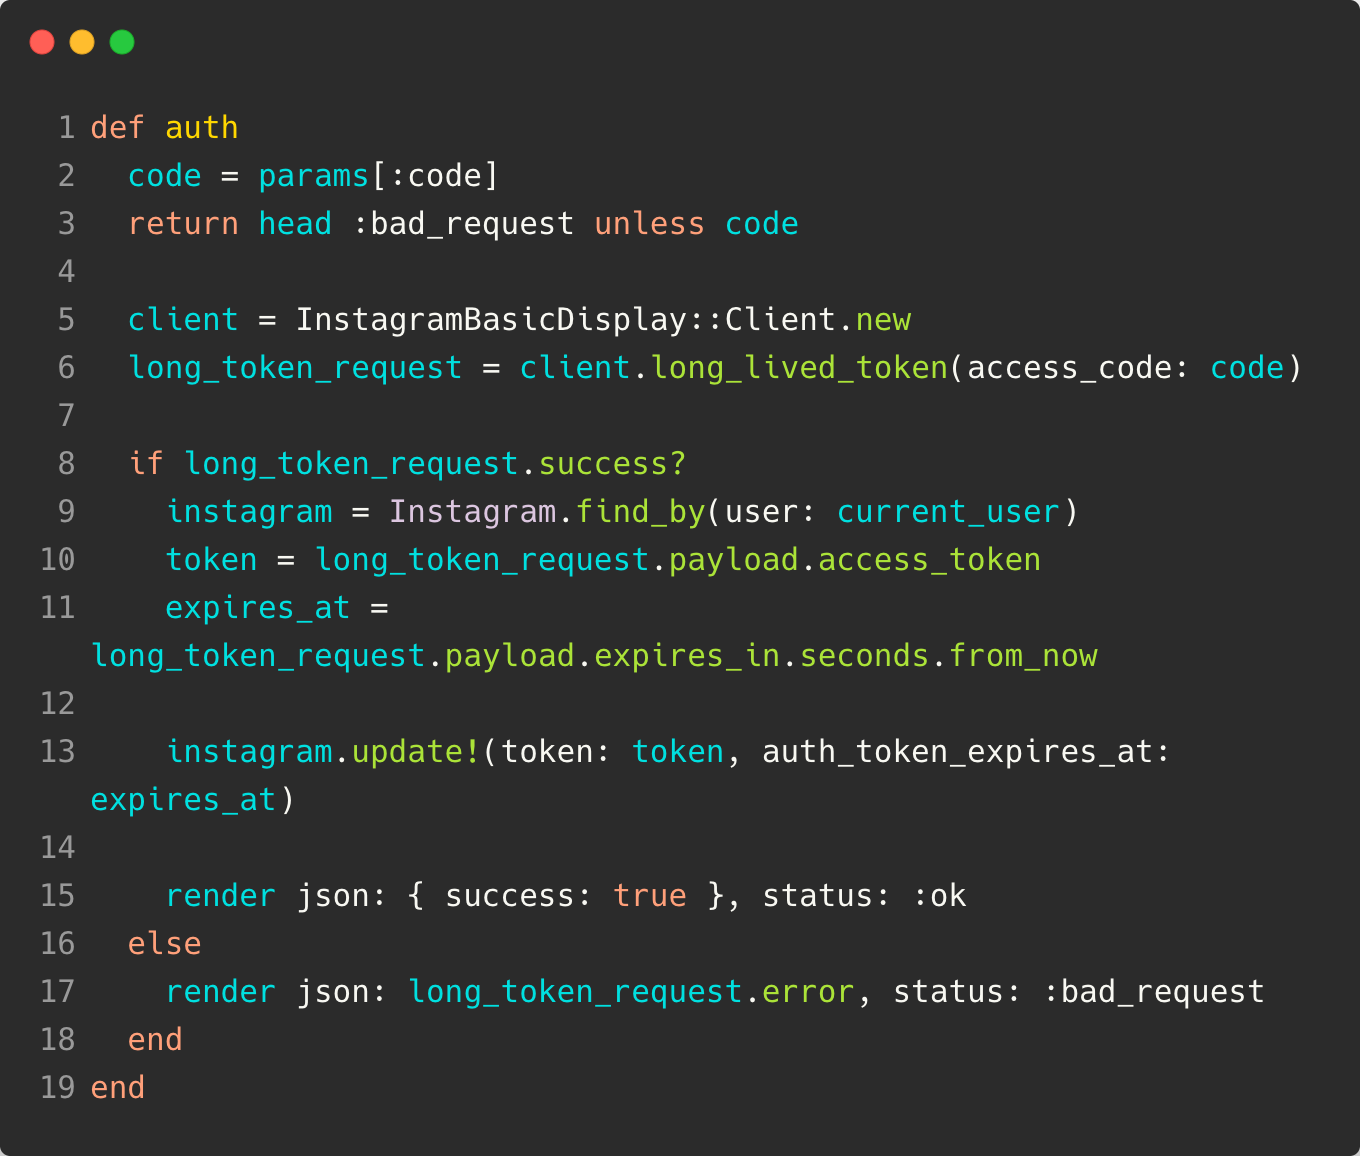
With that in place, we’re able to make requests to Instagram to retrieve media! Now we’re getting to the fun part.
3. Getting Media from Instagram
Using our client gem, we can request a user’s Instagram feed and get media urls for each of their posts.
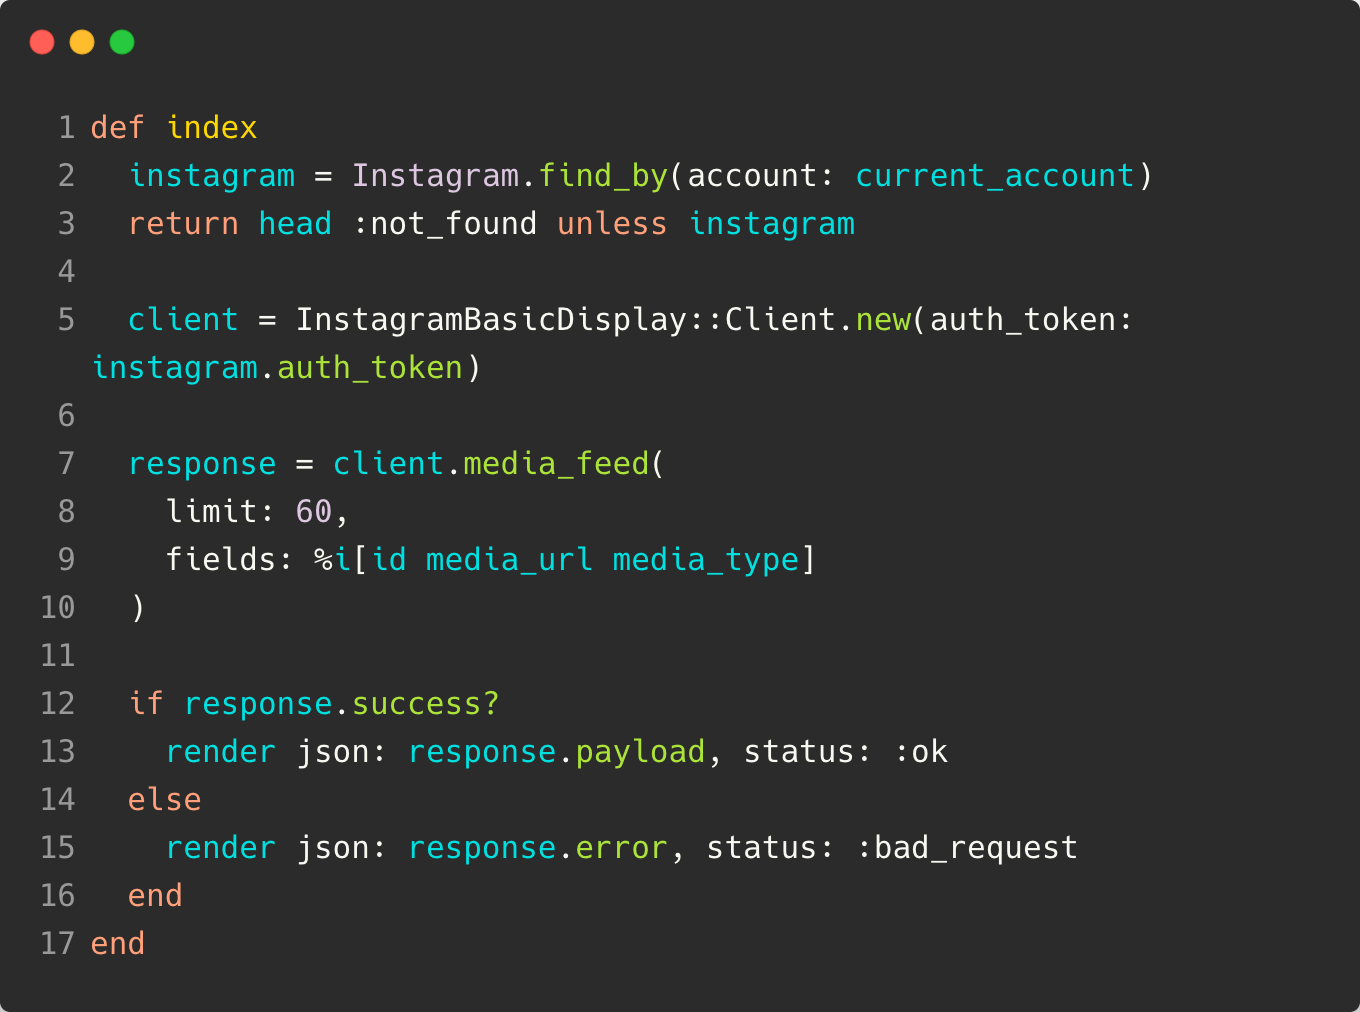
We send the list of media over to our frontend, where we render a modal where users can choose the image they want to use.
If you want to know more about configuring requests for media feeds, and how to paginate, check out the examples in the gem documentation.

4. Finishing touches: refresh worker and deletion callback
We added some final touches to round out our feature before we submitted it to Facebook for approval.
We didn’t want our customers to have to reauthorize every 60 days, so I created a worker that runs in the background every day to refresh tokens that are about to expire. If you use something like Sidekiq, you could create a similar worker:
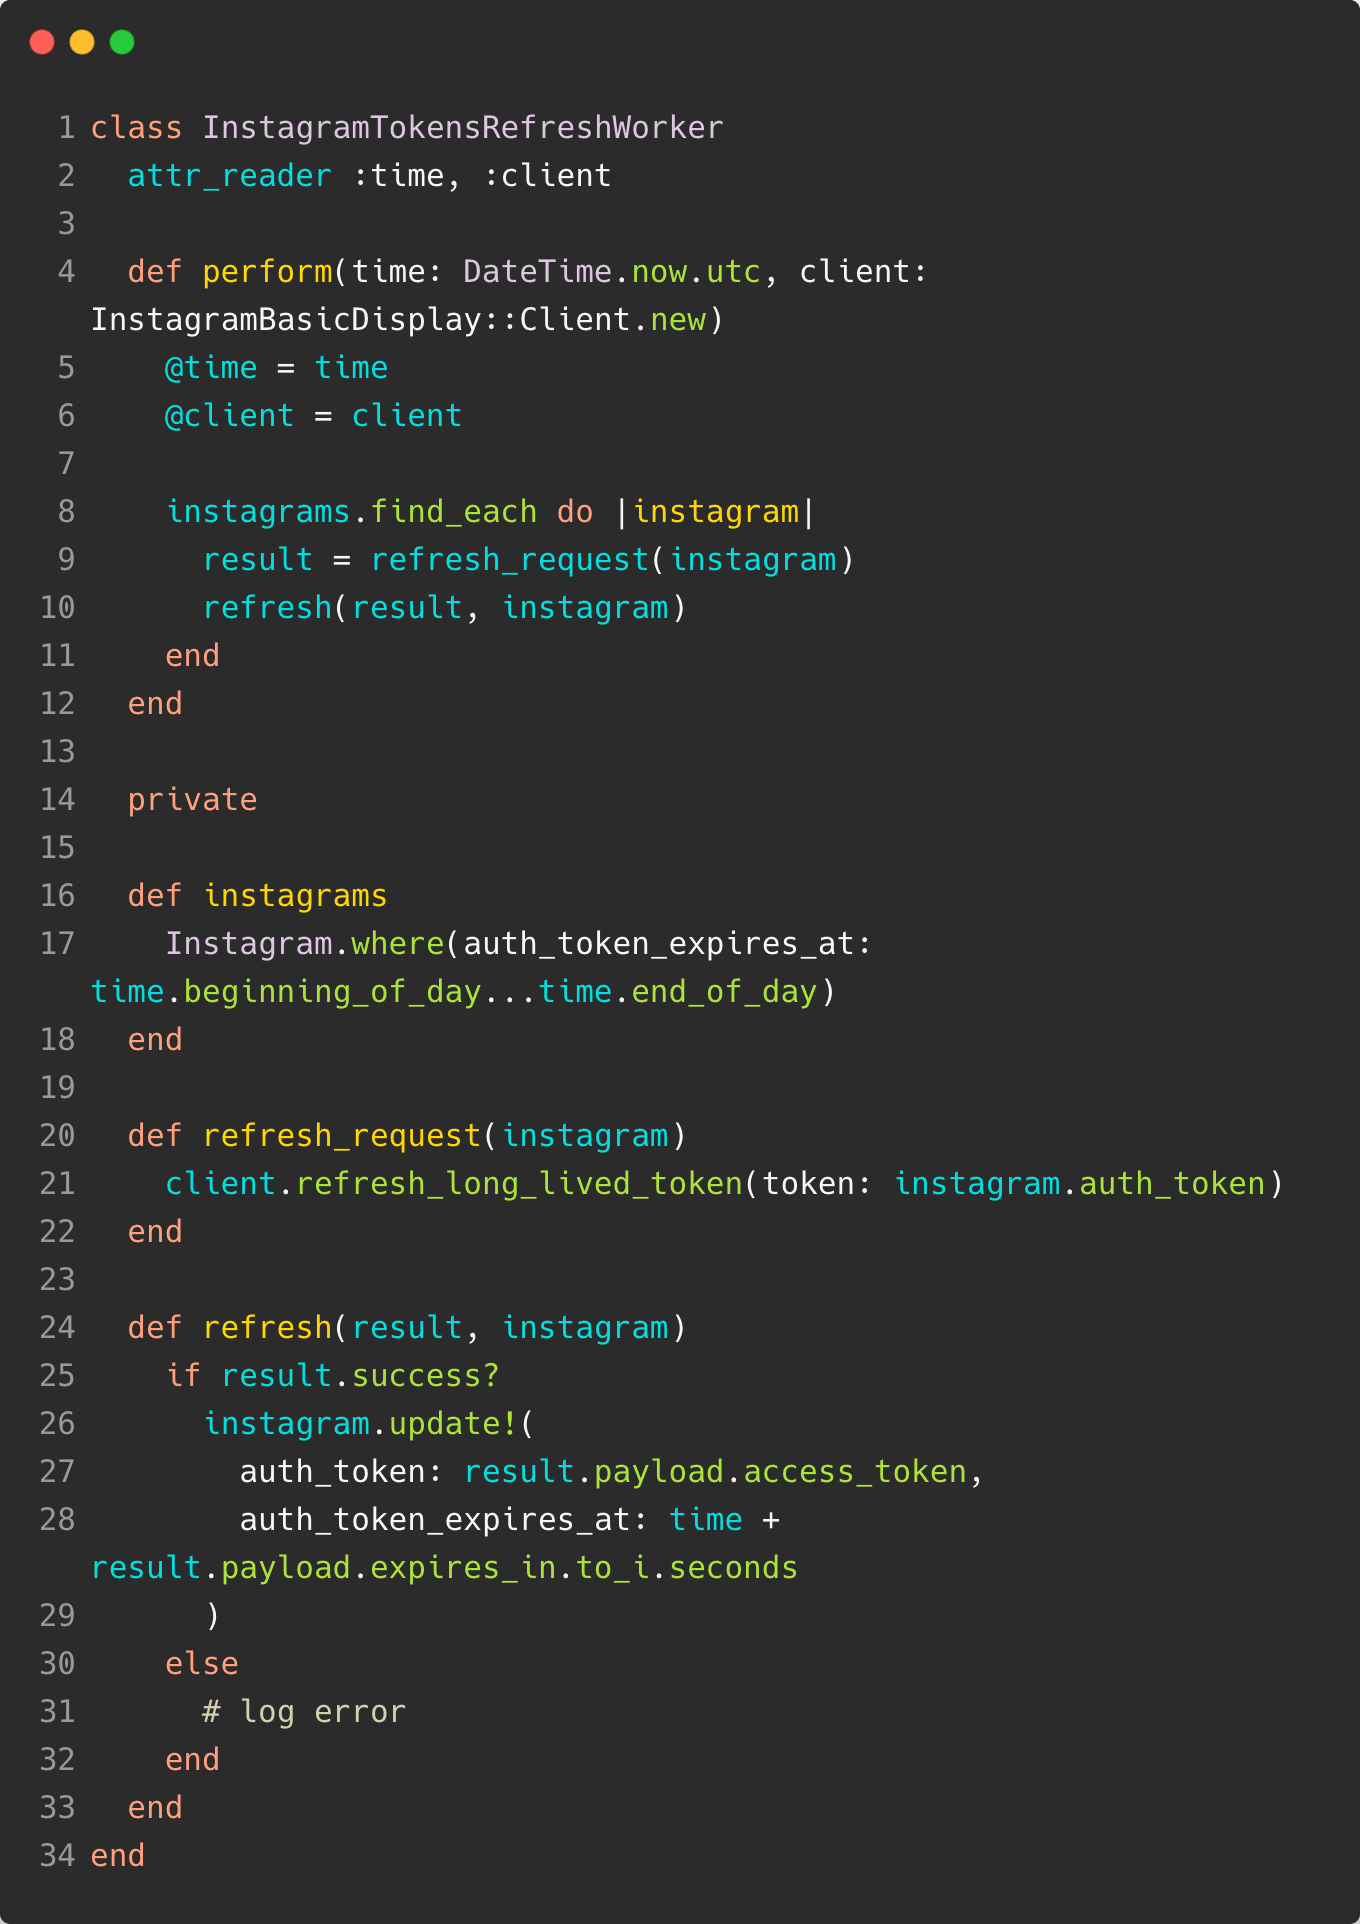
Finally, we implemented an endpoint that handles data deletion requests. If someone requests to destroy their data, we’ll receive a request at this endpoint, delete the data, and let Facebook know that we’ve done it.
With everything in place, we submitted our app to Facebook for approval. It took a couple of tries 🙃, but our app was approved, and we launched the feature shortly after.
Overall, it’s been solid. We’ve since started to use the gem in other places in our app (keep an eye out for new features!), and it’s held up well.
If you use the client gem in your own work, we’d love your feedback and any contributions to it!